Say you want to permanently get rid of some unused audio files in your song, and you’ve manually deleted the files in the Arrangement Window. You even went so far as to make sure there are no ‘Unused Files’ in your Manage Files window. But when you check the ‘Samples’ folder inside your Ableton project folder, you still see the unused audio files you thought you deleted! There’s a simple answer to this dilemma and it has to do with the Backup folder in your Ableton project.
After version 10, Live automatically creates a Backup folder within a Project after a Live Set is saved. If any of those back up projects reference audio files you’re not using in your current project, they won’t be marked as unused. Therefore, the only way to permanently delete these audio files is to delete the ALS backup file associated with them.
Steps to permanently delete unused audio files in Ableton
1. First, before permanently deleting any data make sure to have a duplicate BU of your current Live project. You can do this by storing a copy on an external hard drive, cloud storage, or hold down ⌥ and dragging the entire project folder to a different location.
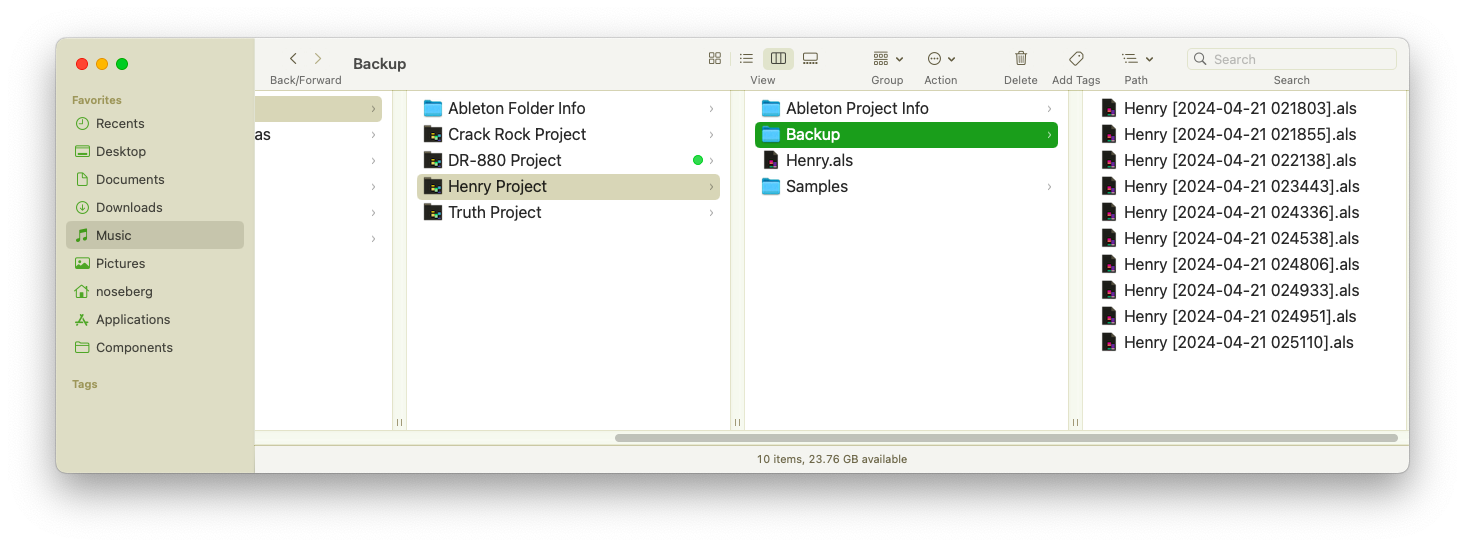
2. Next, navigate to your project ‘Backup’ folder. From there delete all backup ALS (Ableton Live Session) files. These have the als extension at the end of the file:

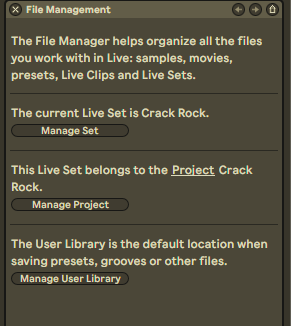
3. From there, go to your File Menu at the top and select ‘Manage Files’. The File Management window will appear on the right of your screen. Click on the second option titled, ‘Manage Project’. The fourth option down will be ‘Unused Files’. You can click on this button to display them in your Live Browser.


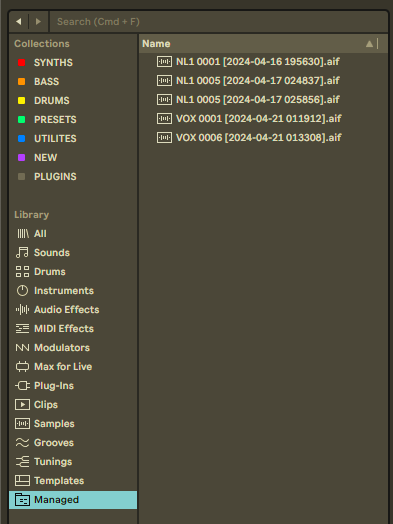
4. Finally, select all the unused files in your Managed folder in your Browser, and press Delete. They will be moved to your Finder trash can and you can empty it to permanently delete the files.

5. From here I would opt to perform a ‘Collect All and Save’ command under the File Menu as a safeguard that my new project is self contained and won’t have any orphaned files.
Hopefully this tip has helped some of you out there and if you have any Ableton questions, feel free to reach out to me on my contact page.
On a related note, if you’re having issues with Ableton Live duplicating audio files, be sure to read my solution here.